
Metal Detecting Tips & Tricks You Haven’t Considered
Published by Mark Tymensky on 09/01/17
Every detectorist wants to continue to get better and better at hunting and finding treasures. They do so through experience, of course – the more you hunt, the more you find, and the better you get at it. But, you can also learn a lot from the experiences of others, so that you have even more information at hand, and sooner. The following list includes some tips you may not have considered that might just help you get better at detecting sooner rather than later.
Top 8 Metal Detecting Tips & Tricks
1. Don’t Abandon Iffy Signals
Digging the signals that don’t sound encouraging or that you don’t think indicate anything of value can prove to be worth your time. Sometimes those iffy targets turn out to be something great, so if you have the time, dig them. If it doesn’t turn out to be anything worthwhile, then at least you’re clearing the surface junk away for a more rewarding return hunting trip.
2. Carry Extra Batteries
There’s nothing worse than having to cut a hunting trip short because you run out of batteries. Always carry an extra set of new batteries with you. The batteries that you have in your equipment are going to run out sometime, being prepared will save you the hassle of having to stop searching to go buy more.
3. Take an Extra Metal Detector
Take An Extra Metal Detector
All detectorists know that the first step to hunting a site is to obtain permission to search there. Next time you ask a property owner for permission and you get some push back, ask them to join you (if you have an extra detector). They are likely to be intrigued, and that will make them more likely to say yes.
4. There is No Such Thing as “Hunted Out”
Never discount a site because it’s been “hunted out.” If a site has produced significant finds already, it’s probable that there is more treasure there. Changing the depth and sensitivity settings on your detector may help you locate more finds.
5. Pack Your Tool Box for Every Trip
Maybe you’ve only got enough time to search a small area sometimes so you don’t think you need to take all your gear. But it really is worth it to have all of your tools packed and ready to go, and to take them all with you every time. It’s better to have the specific tool you need than to wish you had it when you’re out hunting.
6. Rescan and Re-dig to Find More
Don’t stop just because you find one target when you dig. Take a few extra minutes and dig a little deeper and use your pinpointer to see if there is anything else there. This tip is especially useful when you find coins – where there is one, there is often more.
7. Use a Frisbee When Digging

Use A Frisbee
Whenever you dig for a target, you want to be able to fill in the hole, leaving it looking as close to what it looked like before you dug as you can. Some detectorists use a piece of fabric or paper to place the dirt that they dig out so that it’s easy to dump it back into the hole when they are done. A Frisbee turned upside down works even better for that, and it can be washed and reused forever.
8. Hunt After Rain
Next time you have some rain, try going out searching while the ground is still wet. This helps detectorists in two ways. First, it’s much easier to dig in wet dirt than hard, dry dirt. And second, wet ground provides better conductivity so you may be able to detect targets that are buried deeper.
You’ll come up with your own tips and tricks as you gain more experience detecting. Be sure that you take the time to share them with your fellow detectorists; they will appreciate it. For additional ideas, you can have a look at these metal detecting tips for beginners.
Metal Detecting 101 – The Sensitivity Setting
They say that the best place to start metal detecting is in your own backyard. So, for our latest outing, we decided to do just that. Well, sort of. Just behind our home is one of Tucson’s public high schools. We decided to go and check it out and see what we could find. But more importantly, we were looking to get more experience with our detector.
As rookie detectorists, my husband, stepson, and I set out to practice with our detector and try to learn more about the settings, alerts, and how to determine if we could tell what types of targets we would find. We headed to the school and found a beautiful desert trail that wound around behind the baseball field.
We weren’t really expecting to find anything of value, this excursion was about becoming more familiar with our detector. We’ve
Sensitivity Setting
fallen into detecting roles – my husband handles the detector because neither my stepson nor I have the patience to move slowly and deliberately, my stepson has control of the pinpointer, and I dig for the target.
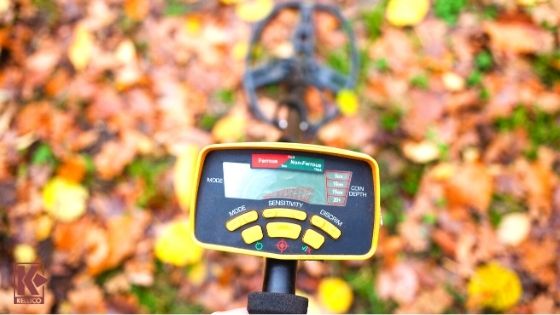
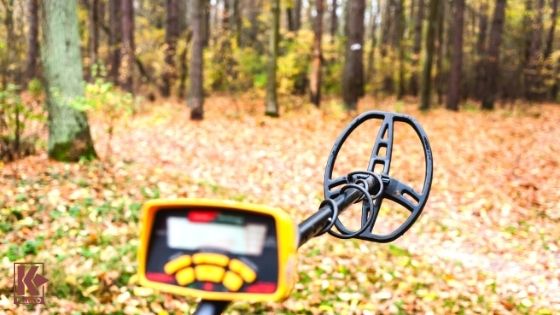
Focusing specifically on the sensitivity setting, which is the detector’s ability to react to varying amounts of electromagnetic fields generated by metals, we started searching. We found that when we had the setting at its most sensitive, our detector could detect even the smallest bits of foil gum wrappers buried under the dirt. I was actually pretty impressed with the detector’s capabilities. Several times we had difficulty locating the target because it was so small.
At the highest sensitivity setting, the detector made a lot of noise. Even when there were no metal objects to be found, it maintained almost a hum as it passed over the ground. I don’t know for sure, but I think that is because it was responding to the minerals that are naturally present in the dirt. When there was a target, the detector’s signal was very obvious. We found a lot of metal parts that were used when the chain-link fence was constructed around the baseball field. Not exactly treasure, but it was good practice for us because we were able to see that the size of the item, the depth to which it was buried, and the type of metal all made a difference in the sound of the signal.

Chain-Link Fence
We found several bobby pins (I think the girls’ cross-country team runs along the trail) that were very close to the surface, and the intensity of the alert was equal to a large metal bracket that was buried at least six or seven inches in the ground. What this showed us is that we need to focus on the depth setting next time, so that we can further determine which signals warrant digging. Until then, we’ll keep digging everything.
We didn’t have any major finds, although we did find our first coin – a quarter that was just barely covered in the dirt – we did learn about the sensitivity of the detector and how it really made a difference in how many signals we received. Despite our lack of treasure, it was still a very fruitful hunt!
10 Tips to Use Your Metal Detector Correctly
It doesn’t matter how much you paid for your metal detector, how complicated or how simple it seems to operate, your first step always need to be to read the instruction manual. It’s not something that you can just turn on and start finding buried treasure. There are different settings, alert sounds, and care for the equipment that you need to understand first. We have put together a list of 10 tips that can help you use your metal detector correctly.
1. Get Help for Your First Hunting Trip
It’s always a good idea to take someone who is familiar with metal detecting on your first trip out hunting.
Use Your Metal Detector Correctly
If you don’t know anyone who has detecting experience, you can check for metal detecting clubs in your area online. Most veteran detectorists are happy to help rookies get started.
2. Practice
Take your detector for a test spin in your own backyard – more than once or twice. You can place metal items on the ground, like coins, jewelry, and other metal objects, and then swing your detector over them so you get a feel for the machine. You can also bury items at different depths so you can get used to the depth settings and what the alert sounds like the farther the item is underground.
3. Learn Your Alerts
It’s important that you learn to differentiate the alerts your detector makes. Try putting a penny and a gold ring on the ground and swinging your detector over them so you can learn what the alerts for different metals sound like.
4. Search Purposefully
When you are hunting a site, be sure to do so in a pattern so you make the most of your hunting time. Most detectorists use a grid pattern when searching, but you can use whatever pattern you choose – so long as it helps you to cover all the ground you want to.
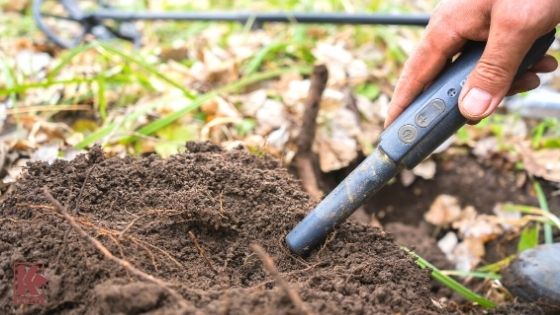
5. Pinpoint Targets
When you are digging a target, you want to do so making as small a hole as possible. That means that you have to narrow down the exact location of the item. While you can start doing this by moving your detector from side to side, and then front to back, it’s helpful to have a pinpointer to narrow it even further and not have to fill in a large hole.
6. Take Out the Trash
When you’re detecting and you dig up something that you don’t care for, like a piece of a foil gum wrapper, or a pull tab from a soda can, don’t just throw it back down. You may want to hunt that area again, and you don’t want to keep digging up the same penny over and over.
7. Don’t Clean Until You Verify

Civil War Relics
It’s tempting to want to clean the things you find while hunting, but for many old and rare coins, Civil War relics, and other valuable items you might find, it may diminish their value. Just make it a rule that you identify the item and do a little research about its value before you break out the soap.
8. Use the All Metal Setting
As you are starting out, you should utilize the all-metal setting on your detector. Not only will it give you more of an opportunity to dig for targets, it will also help you find more valuable items. For example, gold has a low conductivity, so if a gold ring is buried near a piece of foil or nails, but you have those tuned out, you may miss the gold ring also.
9. Understand Salt Interference
Salt can interfere with a detector’s signals. This can be an issue if you are hunting on ocean beaches. You may have to turn the sensitivity adjustments down so the signals stabilize. Unfortunately, this may cause you to lose some depth, but it will help you avoid the interference.
10. Wear Headphones
Wearing headphones will enhance your hunting experience. They will block out wind, traffic, conversations, and other noise as you hunt while preventing the chances that your detector’s alerts will annoy those around you.
Digging Etiquette – Tips for Metal Detecting
Metal detecting is like camping – you have to leave the areas you spend time in the same way that you found them. That means that when you dig for items that your detector finds, you need to do so carefully so that when you are done, you can fill in holes, replace sod, and otherwise make it look like you were never there. Leaving the area in which you have searched looking like it has an overwhelming gopher infestation is a good way to make landowners or caretakers angry, and even to get metal detecting banned in some areas.

Digging Etiquette
There are some simple rules of etiquette that you can apply to digging while you’re out swinging your detector that will help you leave your search area without a trace.
- Use the right tools. Don’t take all of your yard-working tools with you. Big or full-size digging tools are not only cumbersome, but they will draw unwanted attention to you. You’re not going to be digging trenches, so stick with small, easy-to-carry hand digging tools that will cause the least amount of damage to whatever type of ground surface you will be searching. Also, it is a good idea to use a pinpointer, as that will allow you to dig smaller holes and still find your target.
- Cover all holes. Even when you are hunting on beaches, you still need to cover any holes you dig. Whether it’s sand, dirt, or grass, you have to return the area to how it looked before you began digging. This lessens the chances of you being asked to not come back.
- Go straight down. If you are digging in through sod, or other plant life, be sure to dig straight down, not angled like cutting the top off of a pumpkin. This causes the least amount of damage to roots under the surface.
- Make a “U” cut in sod. Cutting into the grass in a “U” shape allows you to simply fold the flap over, leaving the cut part still attached. Once you have found what you are digging for, it’s easy to fill in the dirt and fold the flap back over in its original spot.
- Neatness is key. One of the things that you can do to be neat and thorough in replacing dirt and sand is taking a piece of cardboard or cloth with you to put dug-out dirt on. Once you have removed your target, the dirt or sand can simply be dumped back into the hole from the cardboard or cloth. That way there are no dirt leftovers on the ground that look messy.
- Be quick if you can. This is especially important when you are digging in areas with grass or plants. The faster you work, the quicker the sod or plants go back to their places in the ground, returning exposed roots to where they belong.
- Rehydrate the grass. Take some water with you to give the grass a quick drink when you’re finished digging. This helps, especially if you’re digging during the hot summer months.
You’re going to want to dig everything, especially when you are just starting out with your metal detecting hobby. So using these rules from the get-go is a good way to make sure that you are in the habit of being a conscientious hunter.
5 Unconventional Metal Detecting Tips
Sometimes, metal detecting requires some creativity to have an advantage when you’re searching. The best way to do that is to come up with some unconventional methods that the majority of other detectorists don’t do. Here are five of those to get you started:
1. Dig Three Extra Holes
This is a great tip that can net extra finds. When you have decided that you have been hunting long enough, make yourself dig three more holes. If you’re on a site that has a lot of targets, you will be more focused to make the three that you dig count. If you find a keeper in one of the three holes you dig, start over with three more.
2. Put Your Detector Down and Pick Up Your Pinpointer
When you find a spot with a deep pocket spill or a deep bullet spill, it’s fairly likely that there are additional relics to be found there.
Grab Your Pinpointer
This is when it might be worth your time to dig out the area (to about a foot and a half or two feet in diameter) and use only your pinpointer to hunt as you go. This method may net you finds that you would otherwise have missed.
3. Be Willing to Get Dirty
If the weather in your area is unpredictable, then you know how frustrating it can be when there is a 90 percent chance of rain, yet you never see a drop, but you stay inside and miss a day that would’ve been great for hunting. When you’re willing to go out anyway and get rained on and muddy if the weatherman is actually right, you may find some real keepers. Most detectorists, even if they do go out hunting in the rain, aren’t willing to get down and dig in the mud. That makes it a perfect opportunity for you to swoop in and find the treasure. Just be sure that all of your detecting equipment is waterproof.
4. Ask a Second Time, But Differently
This is a tip that most detectorists rarely do. If you are turned down by a property owner for hunting on their land, but you think that it has potential, try again. While you don’t want to badger anyone, it’s not unreasonable to try again every few months to see if they have changed their mind. It may be as simple as changing the way you approach your request. Let them know that it’s a goal of yours to search their property, or that you will do something for them in return (mow their lawn, trim their trees, etc.), and see if they soften up a bit. They may see your persistence as a good thing and eventually give in.
5. Track Fruitful Sites and Finds on Google Earth
You won’t find many detectorists taking the time to do this. It’s a great tip for when you are hunting larger properties or neighborhoods. Using Google Earth, mark the spots where you find targets. You can use different notations for sites where you’ve dug interesting finds, valuable finds, nothing or next to nothing – or come up with your own way of differentiating. When you look at your notations, you may find that there are patterns that might not have noticed otherwise. It could show what might be old home sites, roadways, or even battle lines, depending on where you’re hunting and what you find. This will help you focus on areas that are more likely to have the types of finds you are looking for.
How to Get Started with Metal Detecting
Metal detecting is a fun hobby that nearly everyone can do. It doesn’t require a lot of heavy lifting (most detectors are very lightweight), and as long as you don’t mind doing some digging in the dirt, you’ll be all set. Of course, if you don’t want to get dirty, just bring a kid along with you – they will love digging with the possibility of finding something exciting.
Getting started with metal detecting is fairly easy. The first step is deciding on and purchasing a metal detector. There are many
Get Started with Metal Detecting
different machines to choose from and just as many different prices. Since you are just starting out, you may want to begin with a fairly inexpensive detector to get the hang of it. You also have to consider where and what you will be detecting. There are detectors that are suited specifically for gold nugget hunting, for example. Don’t be afraid to talk to the salespeople wherever you are shopping for your detector. They will be able to guide you in the right direction. Tip: Consider the Brand New Makro Kruzer Metal Detector only at $649 featuring a robust waterproof design (up to 16.8 ft depth)!
Once you have your metal detector, you will probably want to head outside and give it a spin, and that’s fine. Just be sure that before you spend too much time swinging it around, you take the time to read the user’s manual to get familiar with your machine. You will have the best results hunting when you understand how the detector works and how to use the settings.
Familiarize yourself with metal detecting etiquette and how to ask permission for hunting sites from property owners. These aspects of detecting are extremely important. If you are not a courteous detectorist, or if you hunt without obtaining permission, you could get yourself into some trouble. There are plenty of places online that talk about metal detecting etiquette and gaining permission – check some out.
The next step is all about practicing. Set up a test garden outside by burying various types of metal items at various depths. Then, practice swinging over those items, paying attention to the alerts your machine makes. Learning to differentiate the signals based on what type of metal and how deeply it’s buried is essential to having successful hunts in the future. Be sure that you include “trash” in your test garden like the soda can pop tops, foil gum wrappers, and the like because you will encounter a lot of that kind of thing when you hunt for real.
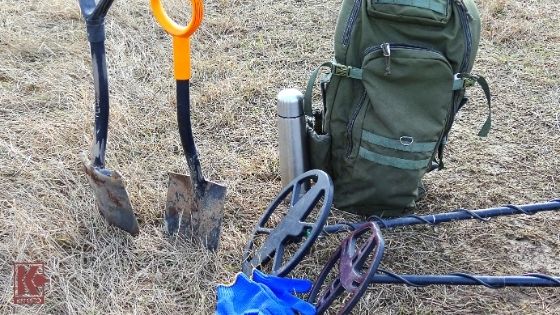
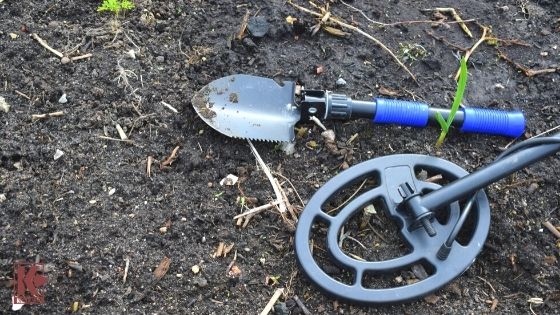
When you feel that you are ready to take your new detector out for your first hunting trip, you will need some other tools. Of course, you will need something to dig with. There are a lot of digging tools available. Consider the types of soils you will be digging in. If you live in an area where the ground is particularly hard, you will want a tool that can handle that. If you plan to detect areas with lots of grass, you will want to have a tool that can easily cut through the grassroots. Digging on beaches or in sandy areas will mean that you need a sand scoop. Wherever you decide to hunt, make sure that you have an appropriate digging tool.
You’ll also want to invest in a good pinpointer. While you don’t necessarily have to have one right away, using one will significantly cut down on your digging time and it will make it much easier to fill in the holes you dig. Pinpointers range in price from pretty inexpensive to quite pricey, and you can get regular ones or waterproof ones for pinpointing targets in shallow water.
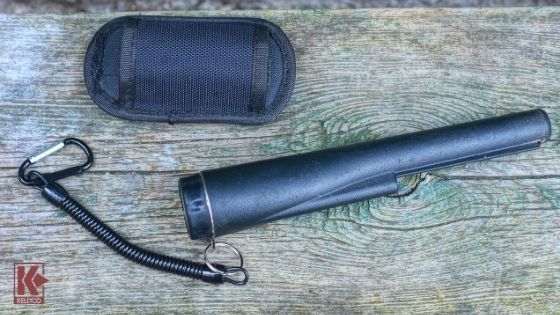
Invest In A Good Pinpointer
The last thing you’ll need to get started is something in which to carry your finds. A pouch that you can secure around your waist is often all that you will need to keep your items safe as you find them.
Now you’re ready to go! Get out there and hunt, you never know what treasure awaits!
Metal Detecting Tips and Techniques for Beginners
Welcome to the exciting world of metal detecting! If you are new to the hobby, you have landed on a fun and perhaps even a lucrative pastime. Mastering metal detecting takes time and some trial and error, but there are some tips and techniques that will make it easier as you begin your new hobby.
We’ve listed 15 awesome tips for metal detecting beginners, so you can grab your detector and get started swinging.
#1 – Buy the best detector you can afford. Even if your budget is limited, buy the best metal detector that you can get for it. You won’t be sorry for spending a little more than you anticipated.
#2 – Start in your own backyard. As you are learning about your detector, start by hunting your own yard and areas that are close to your home. This will give you time to practice and get to know your detector.
Expect To Find Trash
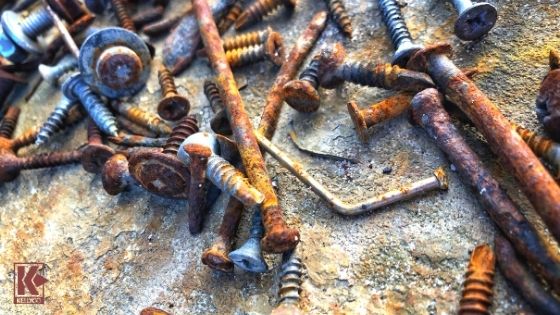
#3 – Expect to find trash. Your metal detector is going to pick up targets that are not worth anything. Expect to find a lot of bottle caps, pull tabs, nails, and pennies. But don’t be discouraged, it is all good practice and you never know what you will find with the next alert.
#4 – Dig everything. Until you become accustomed to different sounding alerts, it’s important that you dig every signal from your detector. You don’t want to miss something great because you assume it’s a bottle cap.
#5 – Search more, find more. Metal detecting requires persistence. The more time you spend hunting, the more opportunity you will have to find treasure.
#6 – Avoid high traffic times. While you do want to hunt in areas that tend to be heavily populated (or that were at one time), it’s easier to navigate your metal detector when there are fewer people around. For example, if you are going to hunt at the local park, don’t go on weekends when there are a lot of families spending time there. Instead go on a weekday or an early morning when there are fewer park goers.
#7 – Research first when hunting for relics. If you are specifically looking for relics or antiquities, you need to find historic places, and that requires some research. You can search online, visit the library, talk with local historians, and get access to old maps at your local city hall to help you find the hot spots.
#8 – Alternate your hunting sites. If you don’t find anything of value when you hunt the local park today, it isn’t likely that you will find something there tomorrow. Instead of hunting the same sites consecutively, rotate sites to put some time between hunting in the same places.
#9 – Hunt early or late in the day. While you don’t want to hunt when it’s getting dark outside, it is a good idea to search early or late in the day to avoid groups of people.
#10 – Carry a pouch. You need to have a pouch or bag to carry your finds in. It’s also important that you remove any trash you find, don’t just throw it back. This will save you digging the same trash over and over again when you return to the site.

Search After Rain
#11 – Search after rain. Not only is wet ground more suited to conductivity, but it will also make it much easier to dig.
#12 – Choose comfortable headphones. You don’t have to have headphones, but it will make it easier to pick up on weak signals. If you do choose to wear them, make sure you get some that are comfortable; you may be wearing them for long periods of time.
#13 – Always double check holes. When you find one great target in a hole, there might be two! Always rescan the hole before you fill it in.
#14 – Slow down. Most new detectorists fall into the habit of swinging their detectors too fast. Slow down your swing, making it even and methodical. When you swing too fast, you are likely to miss something.
#15 – Be respectful. Fill in the holes you dig, don’t leave trash behind, and be respectful of any people you come across while you are searching. Whether you like it or not, when you are on a hunt, you are an ambassador for all detectorists, and you should always be mindful of that.
Get Started Hunting
The above tips will help you get started with your new hobby, making it fun and productive. Perhaps the most important tip to remember is to be sure that you always obtain permission to hunt sites before you start searching. You don’t want to get into any trouble or to bring a bad name to other detectorists in your area.
Metal Detecting When You’re Short on Time
Everyone is so busy these days, it seems like there is never enough time to get the things you have to do – let alone having time for the things that you truly enjoy.

Short On Time
It’s easy to let hobbies take a back burner while you are taking care of responsibilities that must get done. But you don’t have to let metal detecting be one of those things that you wish you had time for. You can have a successful and fun hunt even when you are short on time, and there are even some benefits to doing so.
You don’t have to set aside a huge chunk of time to get out and hunt with your metal detector. The next time you have a free hour and you start to think that it isn’t worth it to go for such a short time, consider these benefits to hunting on a schedule.
Energetic Body and Mind
If you are an avid detectorist, you know that it is usually at the beginning of a detecting outing that you feel your best, have the most energy and are on top of your game. When you have been out all day, searching and walking and digging, you get tired. You may pass over alerts thinking that they probably aren’t worth the trouble to dig, and you may not pay attention to swinging your detector carefully and methodically.
When your mind and body are fresh, your concentration is better, you’re not tired from a long day of detecting, and you are less likely to miss anything. Those are all advantages that can make your hunt successful.
Extra Motivation
Knowing that the clock is ticking on your hunt will give you extra motivation to be focused and alert. It is usually early in searching that you are the most excited, filled with anticipation of what you might find, and that additional energy is motivating. It’s especially invigorating if you have been looking forward to the hunt for a while. When you only have a short time to detect, you’re more likely to hunt smarter – and that’s what leads to a great outing.
First-Find Phenomenon
How many times has your very first found been your very best find on a detecting trip? It happens a lot. That’s what detectorists call the “first-find phenomenon.” Of course, it doesn’t always happen that way, but it happens enough that it isn’t explainable by the laws of probability. Probably the most reasonable explanation is what is listed above. At the beginning of a search, you are at your best. Your body and mind are fresh, you are excited and motivated, and you are likely to hunt the best areas first – logically and carefully.
The next time you think that you don’t have time for metal detecting, remember the benefits of a one-hour hunt and grab your gear and get outside. You might be surprised at how great it feels and at what you find. It may be one of your best hunts of the year.
Tips to Find More Valuable Targets While Metal Detecting
Every detectorist has metal detecting hunts that have no finds (or very few) that are worth anything. It can be discouraging and lessen your excitement for the hobby. The good news is, there are a lot of ways that you can improve your metal detecting outings by using strategies that increase your chances of finding more valuable targets. We’ve put together some tips to help you be more productive on your next detecting trip.
Strategies for Making Better Metal Detecting Finds
1. Hunt sites that likely have valuables. This may seem like an obvious tip, but it seems like there is always a newer place to search that will have less trash, that is more convenient to get to, or for which it is easier to obtain permission for detecting. While it’s true that there could be a few lost items or coins in a newer area, but the odds of that – or of finding them – is pretty slim.

Valuable Hunt Site
Though older sites likely have more trash because they have had a lot more human traffic, they are also more likely to have lost jewelry or coins for the same reason. So, unless a newer site is a prime area for lost items (like a new resort, for example), then it’s most productive to stick to older sites that have had more traffic.
2. Don’t neglect your research. It’s downright tempting to search areas where you have simply seen as you commute to work every day. You may even know a little bit about the history of the area. However, the place that you are looking at may very well have been searched over and over by other detectorists for the same reason.
If you take the time to do some research to find some lesser-known areas where people used to hang out, you may find a detecting goldmine that few people know about or have hunted. Your odds of finding better, more valuable finds increase greatly when you find those types of sites.
3. Work the sites backwards. Wherever you are hunting, a school, or park, or other sites, try starting with the last area you would normally search. There’s a good chance that other detectorists feel similarly to you, so the “last area” may not have been searched as much as other areas of the site.
4. Reduce discrimination on your metal detector. Many of the best sites for finding lost jewelry or coins have been hunted by detectorists. These spots are typically areas with high-traffic that detectorists look for. While it sounds like that might be a negative thing for future detectorists who hunt the same site, that isn’t always the case. What it means is that old coins and jewelry that may have been lost may also have been missed by previous hunters. That’s because sites that have a lot of traffic tend to also have a lot of trash. Other detectorists likely missed some targets because jewelry alerts are often mistaken for foil or pull-tab alerts, and coins may be close enough to trash that their alerts are blocked by those of the trash.
The way to ensure that you don’t fall into the same category as previous detectorists are to turn down the discrimination on your detector and swing much slower. This will allow you to differentiate between targets that are close to one another – even those coins buried close to trash.
5. Talk about your metal detecting hobby.
You probably have many opportunities to talk about your hobby with others, and that can lead to some great new sites to hunt. This is especially true when you share the information with older residents who have lived in the area for a long period of time.

Talk About Your Hobby
They may be a gold mine of information about areas near you that were used for different purposes (decades ago) than they are today. Perhaps they know about old swim holes that have long dried up, old parks or schoolyards that are not there anymore, or old churches or homesteads that now have newer buildings on the land. If you’re lucky, you may find someone whose grandparents lived near and has an old home and property they will allow you to search.
Happy Hunting
Give some of the above strategies a try – or come up with some strategies of your own. Finding interesting or valuable targets may sometimes seem like it’s too good to be true. But when you get creative, do some research, use the right detector settings, and talk about your hobby, you may just find that those elusive targets aren’t as hard to find as you thought.
10 Most Common Metal Detecting Mistakes
You just got your new metal detector and are ready to get outside and start hunting. Before you do, take a look at the following mistakes that are common to new detectorists. Avoid these blunders and you will enjoy your new hobby even more than you thought.
1. Trespassing
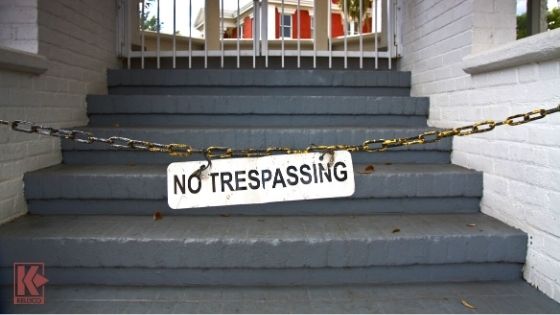
No Trespassing
Ask any detectorist and they will tell you that the number one rule of metal detecting is that you must get permission before searching on any land. Yet, many people still just break out their equipment and start hunting without giving it a second thought. Getting permission isn’t always easy, but you must do it. It will save you the heartache and hassle of getting caught and it will help ensure that other detectorists can continue enjoying the hobby as well.
2. Using the Wrong Digging Tools
There are many options for digging tools out there, from hand-held trowels to detecting shovels. Because leaving the sites where you dig in good condition is important, it’s also important that you use the right size and type of digger. Also, remember to consider what type of ground you will be digging in, the hard desert ground will need a much stronger digger than the sand on a beach.
3. Not Doing Enough Research
The best searches are often the ones in which detectorists spend some time researching. While you may get lucky and find something of value randomly from time to time, knowing the area – and its history – you are searching for will make it much more likely.
4. Not Carrying Extra Parts
If you don’t carry extra coil bolts, batteries, straps, and headphones, there will come a time that you regret it. It’s really frustrating when you are in the middle of a successful hunt and you have to go home to retrieve extra parts.
5. Using Ineffective Search Patterns
It takes a while to get into the “swing” of detecting. Some new detectorists move their detector too fast or don’t follow a logical pattern when they search.

Determine What Pattern Works For You
Determine what pattern works for you (many detectorists utilize a grid pattern) and move the detector slowly.
6. Not Devoting Enough Time
Like any hobby, metal detecting requires a certain amount of time. The more time you spend searching, the better you will get to know your detector and the more successful your searches will be.
7. Buying the Wrong Detector
Many people who decide to start detecting buy the wrong beginning detector. Some may buy one that is too complicated and get frustrated with all the settings, while others may buy one that is too much like a toy and get frustrated when they don’t find anything. Talk with someone knowledgeable about metal detectors and find one that provides a happy medium.
8. Not Using a Pinpointer
Using a pinpointer metal detector to help you narrow down a target’s location will make your hunting much easier. Metal detectors will alert you when they are over the target, but a pinpointer will save you a lot of time digging and sifting for the item. Check out the White’s Bullseye TRX or the Vulcan 360.
9. Cleaning Old Relics and Coins
Rookie detectorists are often tempted to clean their finds. It’s understandable, especially if you want to display them. However, in some cases, cleaning an antique find or an old coin may greatly decrease their value. Before you break out the soap and scrub-brush, determine what exactly you have and if cleaning it is recommended. Online forums and metal detecting clubs will allow you to consult with other detectorists to find out.
10. Having Unrealistic Expectations

Don’t Be Disappointed
Metal detecting is meant to be a hobby, not a way to get rich. While you may find some truly valuable relics or jewelry and coins every so often, don’t set your expectations too high or you are likely to be disappointed. When you enjoy the process of metal detecting, you will find that it’s a hobby that is rewarding whether you find lots of treasure or you don’t.